Underground Kingdom

Underground Kingdom

Events

Rainforest

Alliance Expedition

1 vs 1 alliance event

Here fighters compete for Tunnels so

gatherers can accumulate points more efficiently

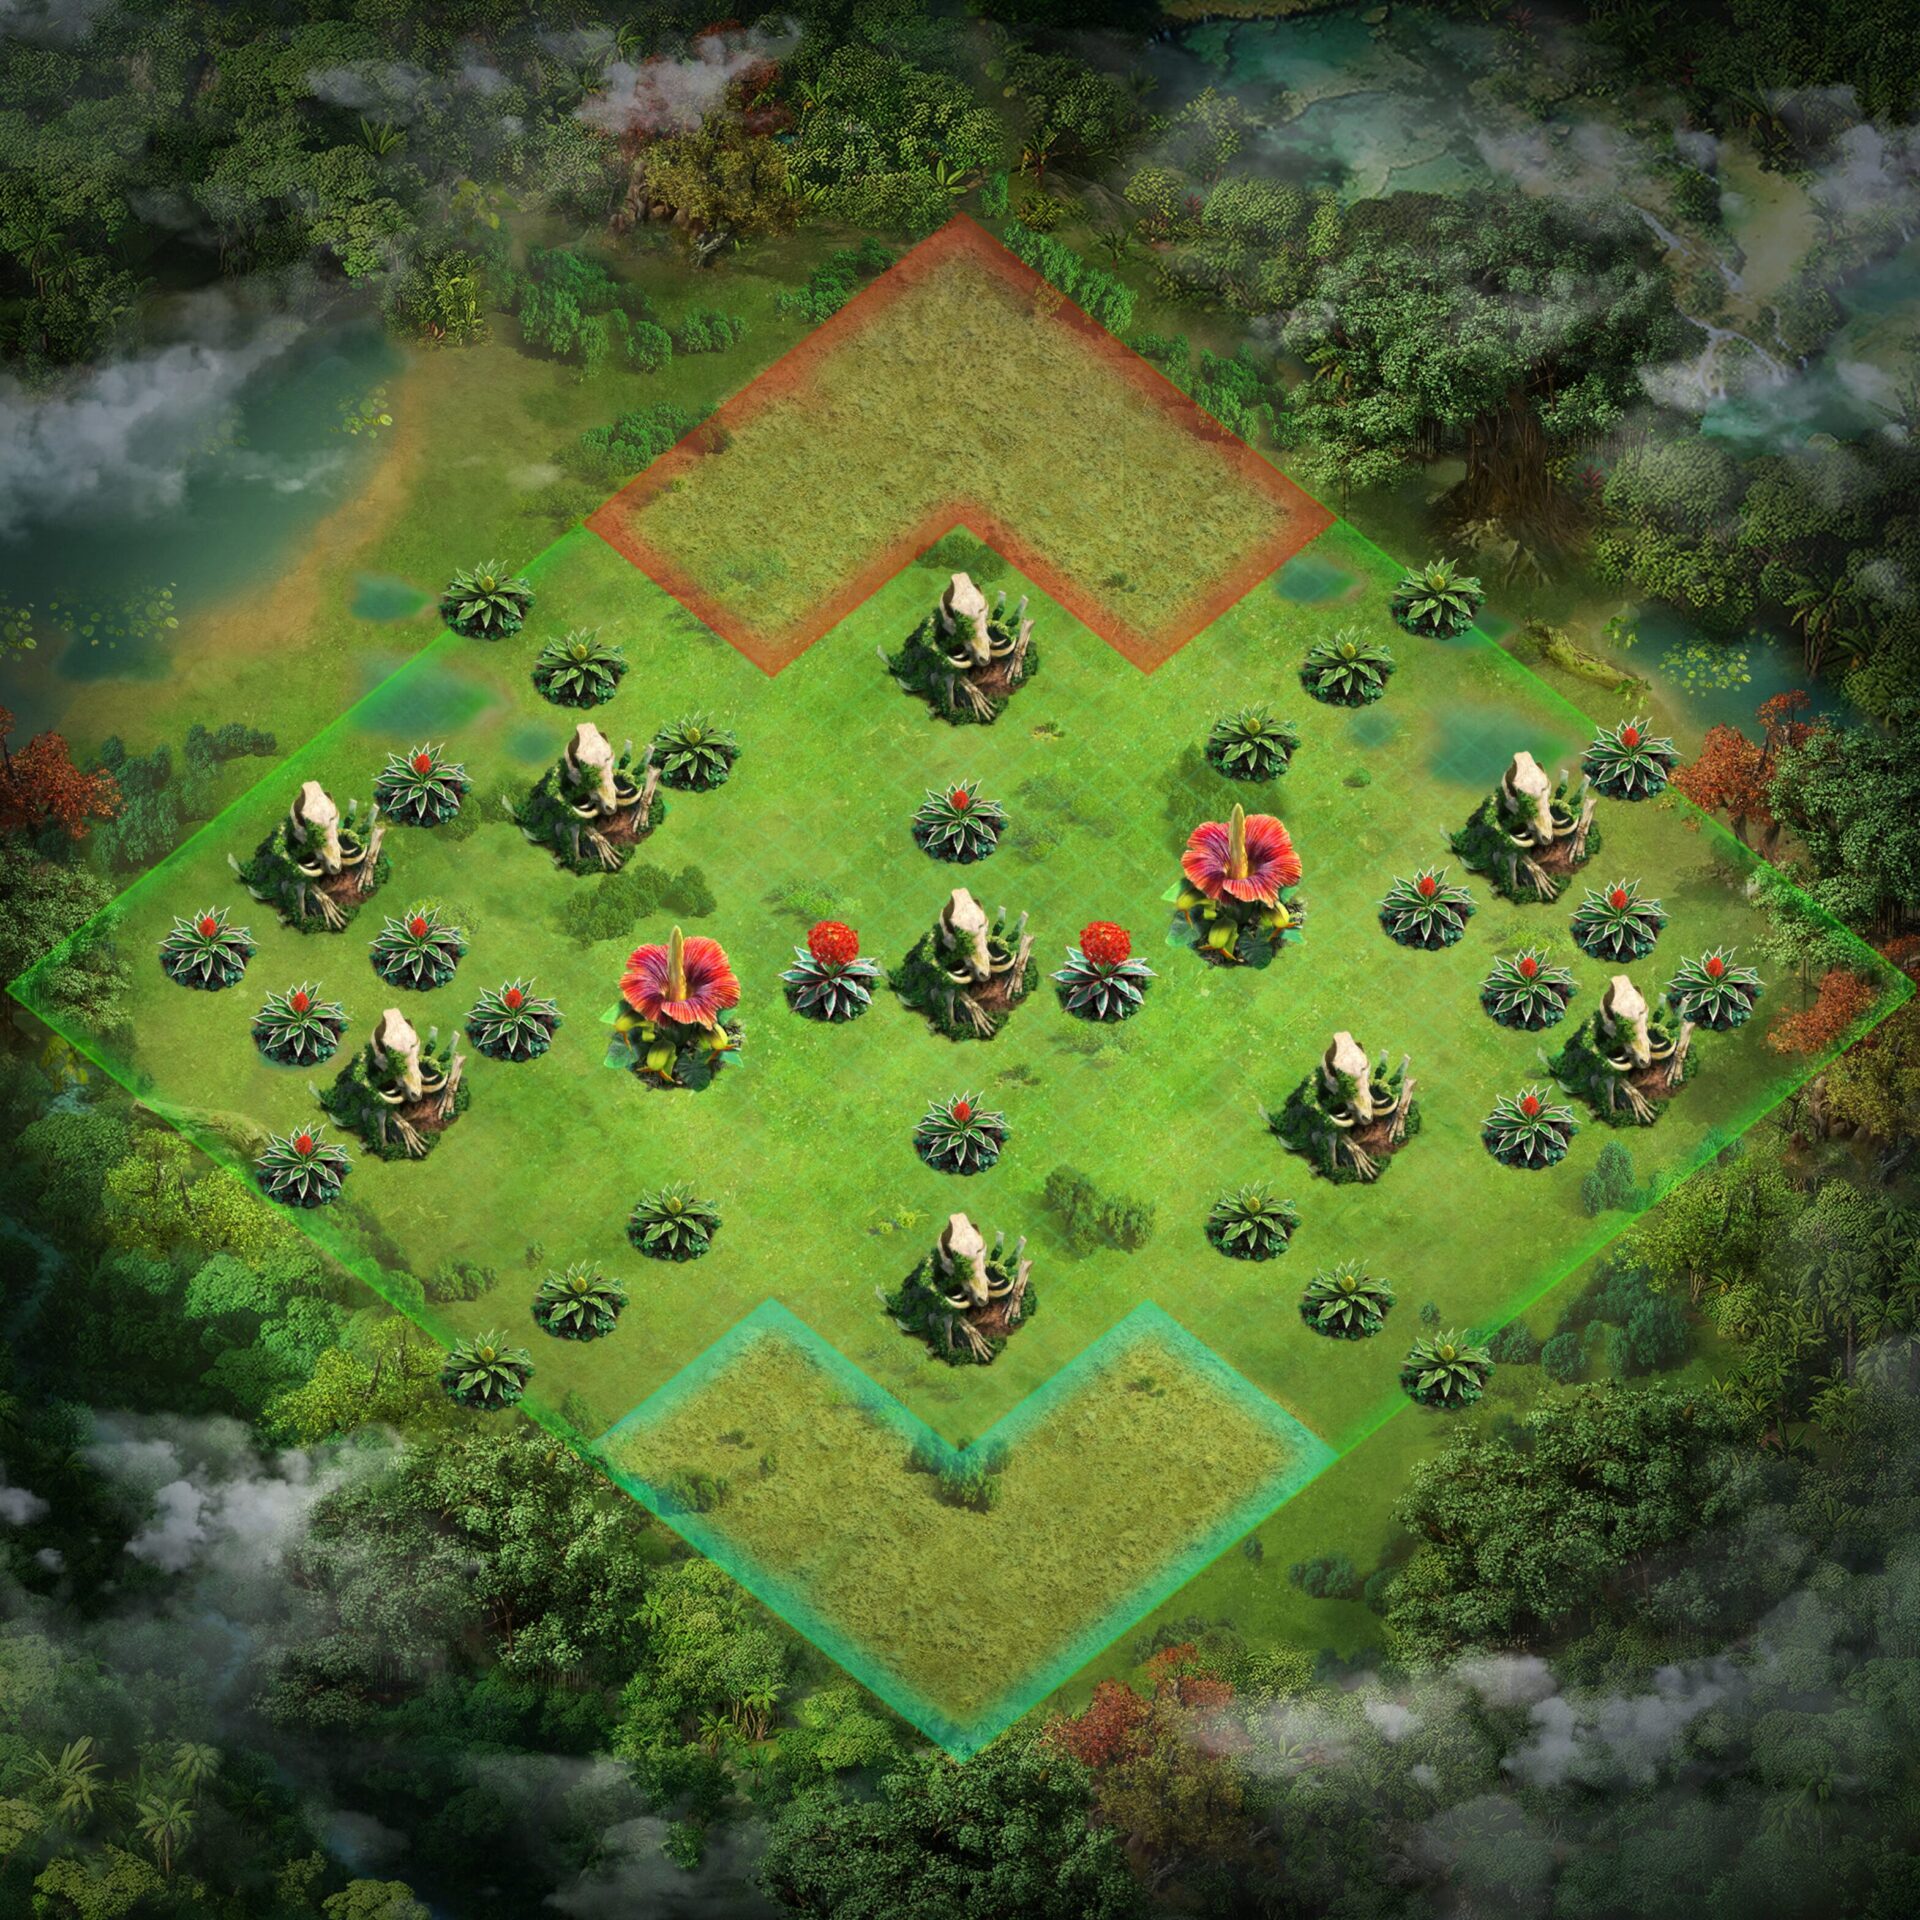
Alliance Expedition Map
Konjac Hotspot
Konjac Hotspot
Tertiary Hotspot
Tertiary Hotspot
Secondary Hotspot
Secondary Hotspot
Secondary Hotspot
Secondary Hotspot
Secondary Hotspot
Secondary Hotspot
Secondary Hotspot
Secondary Hotspot
Secondary Hotspot
Secondary Hotspot
Secondary Hotspot
Secondary Hotspot
Secondary Hotspot
Secondary Hotspot
Primary Hotspot
Primary Hotspot
Primary Hotspot
Primary Hotspot
Primary Hotspot
Primary Hotspot
Primary Hotspot
Primary Hotspot
Primary Hotspot
Primary Hotspot
Primary Hotspot
Primary Hotspot
Tunnel Hotspot
Tunnel Hotspot
Tunnel Hotspot
Tunnel Hotspot
Tunnel Hotspot
Tunnel Hotspot
Tunnel Hotspot
Tunnel Hotspot
Tunnel Hotspot
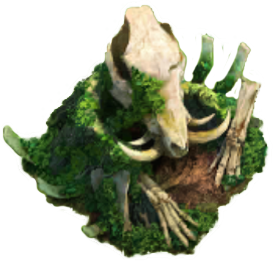
Natural Transport Tunnel - 1 X73 Y73
 
Time required for occupation 5min
Occupation end time 5min
Capacity of available Troops 0/8
Obtained pointsduring occupation 5,000
Natural Transport Tunnel - 2 X43 Y43
 
Time required for occupation 5min
Occupation end time 5min
Capacity of available Troops 0/8
Obtained pointsduring occupation 5,000
Natural Transport Tunnel - 3 X10³ Y103
 
Time required for occupation 5min
Occupation end time 5min
Capacity of available Troops 0/8
Obtained pointsduring occupation 5,000
Natural Transport Tunnel - 4 X13 Y103
 
Time required for occupation 5min
Occupation end time 5min
Capacity of available Troops 0/8
Obtained pointsduring occupation 5,000
Natural Transport Tunnel - 5 X28 Y133
 
Time required for occupation 5min
Occupation end time 5min
Capacity of available Troops 0/8
Obtained pointsduring occupation 5,000
Natural Transport Tunnel - 6 X58 Y118
 
Time required for occupation 5min
Occupation end time 5min
Capacity of available Troops 0/8
Obtained pointsduring occupation 5,000
Natural Transport Tunnel - 7 X88 Y28
 
Time required for occupation 5min
Occupation end time 5min
Capacity of available Troops 0/8
Obtained pointsduring occupation 5,000
Natural Transport Tunnel - 8 X118 Y13
 
Time required for occupation 5min
Occupation end time 5min
Capacity of available Troops 0/8
Obtained pointsduring occupation 5,000
Natural Transport Tunnel - 9 X133 Y43
 
Time required for occupation 5min
Occupation end time 5min
Capacity of available Troops 0/8
Obtained pointsduring occupation 5,000
Aromatic Konjac - 1 X43 Y88
 
Time required for occupation 5min
Occupation end time 10min
Capacitiy of available Troops 0/8
Obtained points during occupation 6,500
Increase speed of points 12,500
Aromatic Konjac - 2 X10³ Y58
 
Time required for occupation 5min
Occupation end time 10min
Capacitiy of available Troops 0/8
Obtained points during occupation 6,500
Increase speed of points 12,500
Tertiary Agave X85 Y65
 
Gathering efficiency 0.01%
Tertiary Agave X65 Y85
 
Gathering efficiency 0.01%
Secondary Agave X30 Y105
 
Gathering efficiency 0.007%
Secondary Agave X30 Y120
 
Gathering efficiency 0.007%
Secondary Agave X45 Y135
 
Gathering efficiency 0.007%
Secondary Agave X1 Y105
 
Gathering efficiency 0.007%
Secondary Agave X15 Y120
 
Gathering efficiency 0.007%
Secondary Agave X15 Y135
 
Gathering efficiency 0.007%
Secondary Agave X135 Y15
 
Gathering efficiency 0.007%
Secondary Agave X135 Y30
 
Gathering efficiency 0.007%
Secondary Agave X105 Y15
 
Gathering efficiency 0.007%
Secondary Agave X120 Y30
 
Gathering efficiency 0.007%
Secondary Agave X120 Y45
 
Gathering efficiency 0.007%
Secondary Agave X150 Y45
 
Gathering efficiency 0.007%
Secondary Agave X60 Y60
 
Gathering efficiency 0.007%
Secondary Agave X90 Y90
 
Gathering efficiency 0.007%
Primary Agave X30 Y75
 
Gathering efficiency 0.004%
Primary Agave X15 Y75
 
Gathering efficiency 0.004%
Primary Agave X1 Y75
 
Gathering efficiency 0.004%
Primary Agave X75 Y120
 
Gathering efficiency 0.004%
Primary Agave X75 Y135
 
Gathering efficiency 0.004%
Primary Agave X75 Y150
 
Gathering efficiency 0.004%
Primary Agave X120 Y75
 
Gathering efficiency 0.004%
Primary Agave X135 Y75
 
Gathering efficiency 0.004%
Primary Agave X150 Y75
 
Gathering efficiency 0.004%
Primary Agave X75 Y30
 
Gathering efficiency 0.004%
Primary Agave X75 Y15
 
Gathering efficiency 0.004%
Primary Agave X75 Y1
 
Gathering efficiency 0.004%

How does it work?

The event takes place every Friday, except during Season events, at either 10, 13, 20 and 22 UTC. Registering on Wednesdays requires selecting the event time and a minimum of 25 active players. The Rainforest map can be entered 10 minutes before start to prepare hills and set Garrison for the fight. Once the event begins, leaving the battlefield prevents re-entry, so Classes, Features and Buffs must be finalized beforehand. The battle lasts for 1 hour.

Aromatic Konjac

Opens 20 minutes after start, occupation grants the alliance 25,000 points per minute for 10 minutes. After 2 minutes it opens again.

Tertiary Agave

Tertiary Agaves offer a gathering efficiency of 0.01% 

Secondary Agave

Secondary Agaves offer a gathering efficiency of 0.007% 

Primary Agave

Primary Agaves offer a gathering efficiency of 0.004% 

How to Gather Efficiently?

To maximize points while Gathering, efficiency is key. This already starts before entering the event by changing to Cultivator, activating its march speed and gathering output Features, as well as stationing a high level Locust for an even higher gathering output.

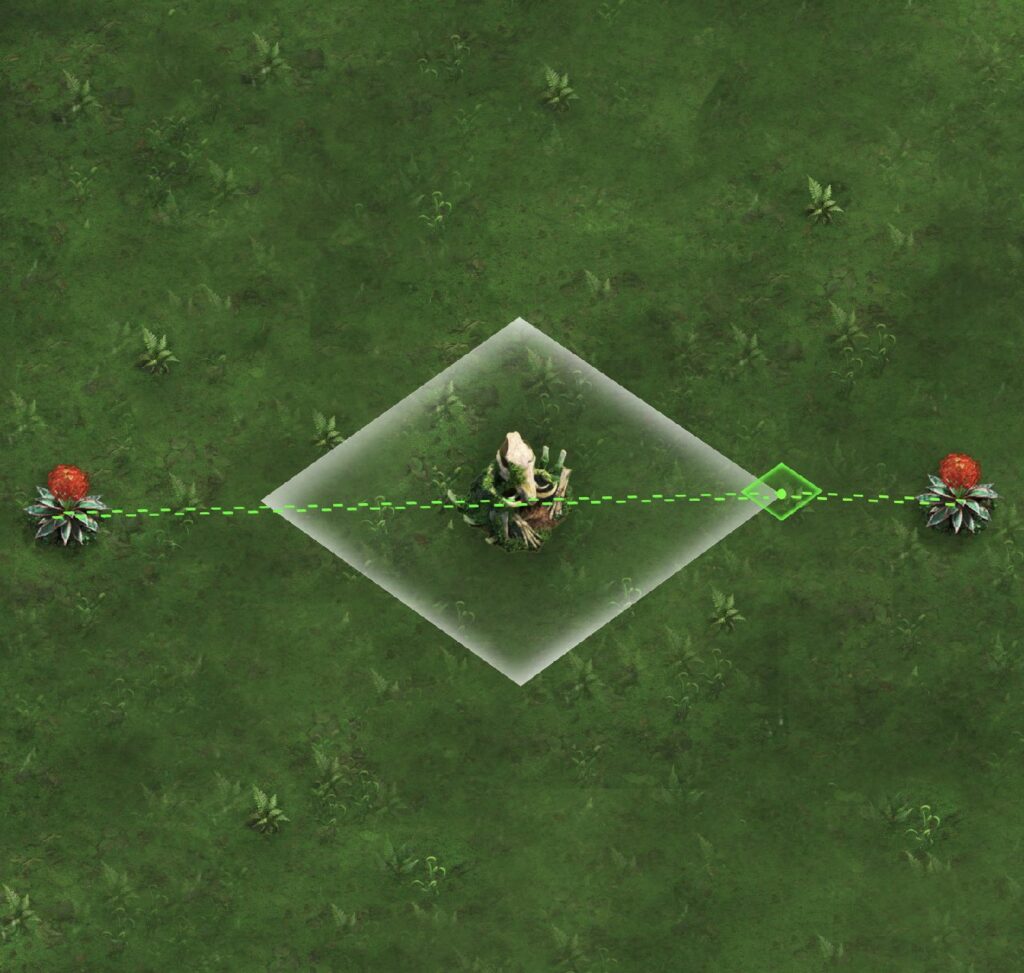
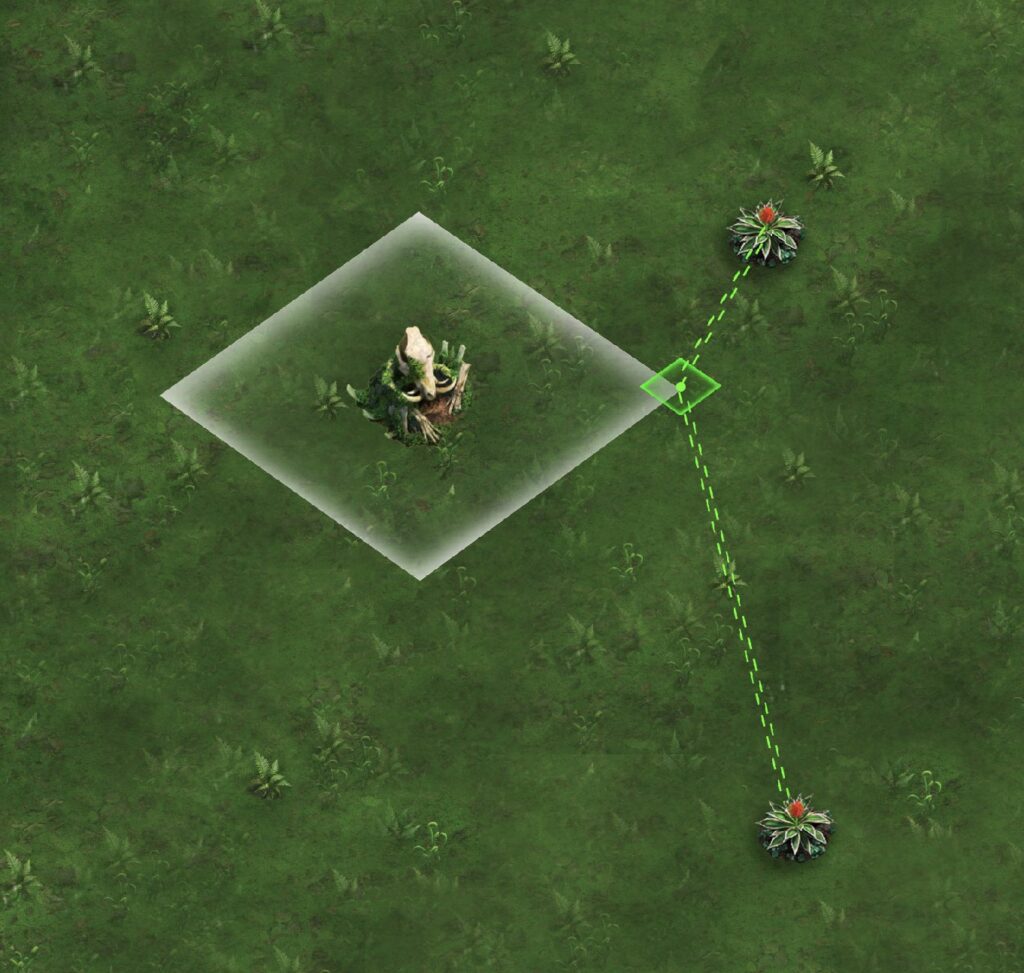
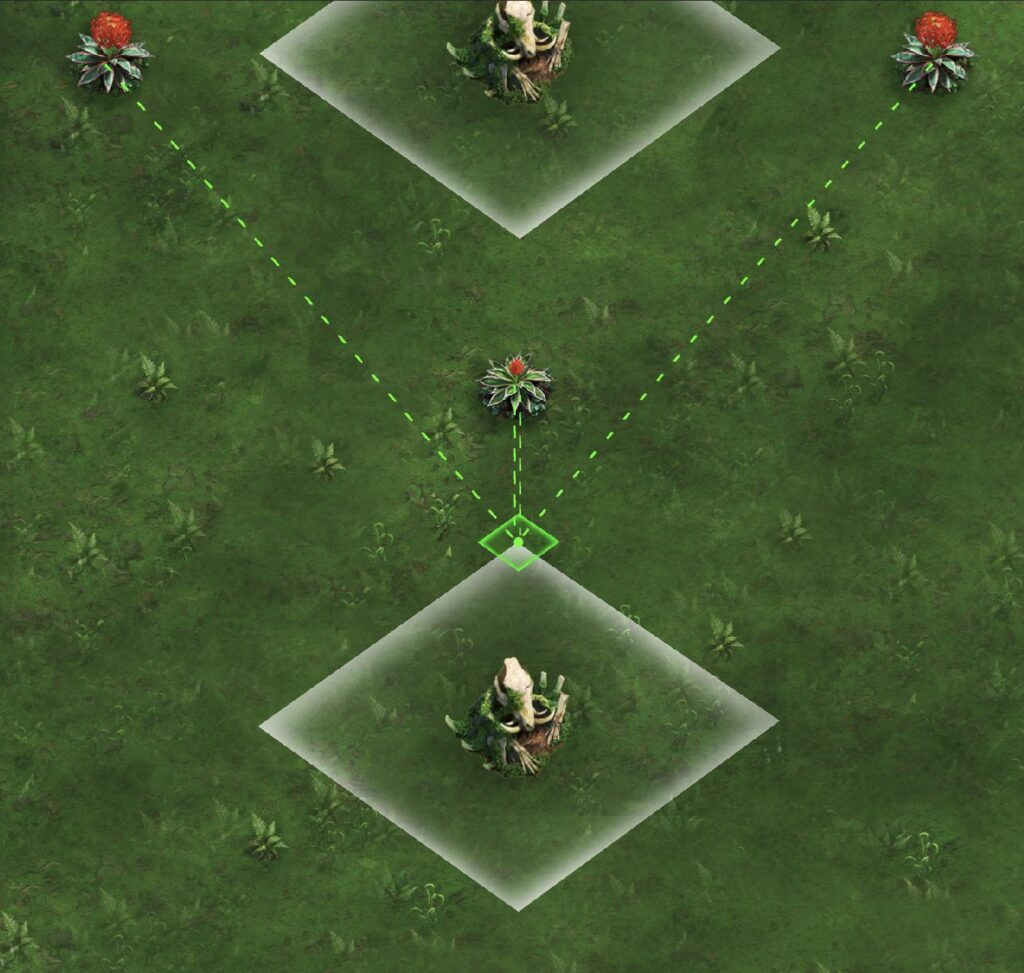
When the fighters have occupied a Transport Tunnel, it is good to know about strategic porting positions — hills can be aligned within a four-tile grid, requiring only one tile of it to be located within the tunnel area which results in being closer to the Agave.

Use the highest starred Insects available and T1 or T2 Carrier soldiers, this gives the unit a boost in march speed. As for Special Ants, all Master Ants have the ability to make the unit run faster as well:

  • Mimicry Master
  • Reap Master
  • Shikaree Master

While Gathering, group the four units into pairs and assign them to two Agaves. Stagger their timing: send one unit to the Agave and when it begins to return, send the second unit. Repeat this process to maintain a balanced and continuous gathering flow.

How to increase Gathering Efficiency even more?

Both the King and Queen positions can boost Gathering points. The King’s extremely fast units allow for quicker gathering cycles, while the Queen increases the total amount gathered per march.

What are the rewards?

In Alliance Expedition the rewards are split into Personal and Alliance rewards. If more than 20,000 points are achieved, Tier 1 of Personal Points gets unlocked. There are Alliance rewards for either Defeat or Win, both rewarding players with Bio Essences. Depending on the Rank, players get rewards including Material for Mutation Flora.

Tier 1 Personal Reward

Tertiary Egg x1
Bio Essence x1

Alliance Reward

Defeat – Bio Essence x2
Win – Bio Essence x3

Ranking Reward

Mutation Lucky Pack
(Depends on Ranking)

Special Ant awakening Gallery

Requirement Cooperation of all Soldier Types at 0-Star

Gallery BonusUpgrade
Guardian Attack0.0%>10.0%
Shooter Defense0.0%>10.0%
Carrier Health0.0%>4.0%
Shooter Attack0.0%
Carrier Defense0.0%
Guardian Health0.0%
Carrier Attack0.0%
Guardian Defense0.0%
Shooter Health0.0%

Requirement Cooperation of all Soldier Types at 0-Star

Gallery BonusUpgrade
Guardian Attack10.0%
Shooter Defense10.0%
Carrier Health4.0%
Shooter Attack0.0%>10.0%
Carrier Defense0.0%>10.0%
Guardian Health0.0%>4.0%
Carrier Attack0.0%
Guardian Defense0.0%
Shooter Health0.0%

Requirement Cooperation of all Soldier Types at 0-Star

Gallery BonusUpgrade
Guardian Attack10.0%
Shooter Defense10.0%
Carrier Health4.0%
Shooter Attack10.0%
Carrier Defense10.0%
Guardian Health4.0%
Carrier Attack0.0%>10.0%
Guardian Defense0.0%>10.0%
Shooter Health0.0%>4.0%

Requirement Cooperation of all Soldier Types at 0-Star

Gallery BonusUpgrade
Guardian Attack10.0%>20.0%
Shooter Defense10.0%>20.0%
Carrier Health4.0%>8.0%
Shooter Attack10.0%
Carrier Defense10.0%
Guardian Health4.0%
Carrier Attack10.0%
Guardian Defense10.0%
Shooter Health4.0%

Requirement Cooperation of all Soldier Types at 0-Star

Gallery BonusUpgrade
Guardian Attack20.0%
Shooter Defense20.0%
Carrier Health8.0%
Shooter Attack10.0%>20.0%
Carrier Defense10.0%>20.0%
Guardian Health4.0%>8.0%
Carrier Attack10.0%
Guardian Defense10.0%
Shooter Health4.0%

Requirement Cooperation of all Soldier Types at 0-Star

Gallery BonusUpgrade
Guardian Attack20.0%
Shooter Defense20.0%
Carrier Health8.0%
Shooter Attack20.0%
Carrier Defense20.0%
Guardian Health8.0%
Carrier Attack10.0%>20.0%
Guardian Defense10.0%>20.0%
Shooter Health4.0%>8.0%

Requirement Cooperation of all Soldier Types at 0-Star

Gallery BonusUpgrade
Guardian Attack20.0%>30.0%
Shooter Defense20.0%>30.0%
Carrier Health8.0%>12.0%
Shooter Attack20.0%
Carrier Defense20.0%
Guardian Health8.0%
Carrier Attack20.0%
Guardian Defense20.0%
Shooter Health8.0%

Requirement Cooperation of all Soldier Types at 0-Star

Gallery BonusUpgrade
Guardian Attack30.0%
Shooter Defense30.0%
Carrier Health12.0%
Shooter Attack20.0%>30.0%
Carrier Defense20.0%>30.0%
Guardian Health8.0%>12.0%
Carrier Attack20.0%
Guardian Defense20.0%
Shooter Health8.0%

Requirement Cooperation of all Soldier Types at 0-Star

Gallery BonusUpgrade
Guardian Attack30.0%
Shooter Defense30.0%
Carrier Health12.0%
Shooter Attack30.0%
Carrier Defense30.0%
Guardian Health12.0%
Carrier Attack20.0%>30.0%
Guardian Defense20.0%>30.0%
Shooter Health8.0%>12.0%

Requirement Cooperation of all Soldier Types at 0-Star

Gallery BonusUpgrade
Guardian Attack30.0%>40.0%
Shooter Defense30.0%>40.0%
Carrier Health12.0%>16.0%
Shooter Attack30.0%
Carrier Defense30.0%
Guardian Health12.0%
Carrier Attack30.0%
Guardian Defense30.0%
Shooter Health12.0%

Requirement Cooperation of all Soldier Types at 0-Star

Gallery BonusUpgrade
Guardian Attack40.0%
Shooter Defense40.0%
Carrier Health16.0%
Shooter Attack30.0%>40.0%
Carrier Defense30.0%>40.0%
Guardian Health12.0%>16.0%
Carrier Attack30.0%
Guardian Defense30.0%
Shooter Health12.0%

Requirement Cooperation of all Soldier Types at 0-Star

Gallery BonusUpgrade
Guardian Attack40.0%
Shooter Defense40.0%
Carrier Health16.0%
Shooter Attack40.0%
Carrier Defense40.0%
Guardian Health16.0%
Carrier Attack30.0%>40.0%
Guardian Defense30.0%>40.0%
Shooter Health12.0%>16.0%